
Comparing pole barn kits and pricing in Oregon and Washington takes more than checking a supplier’s headline number. The building size matters, but so do the material specifications, engineering requirements, delivery details, site conditions, and the work you plan to complete after the package arrives.
A pole barn kit price generally covers a material package for the building shell. Site preparation, concrete, labor, installation, permits, utilities, and interior finishes may be separate. Because inclusions vary, buyers should compare written scopes and request a project-specific quote instead of treating an advertised kit price as the total cost of a finished building.
For Oregon and Washington buyers, a useful quote also accounts for the conditions and requirements at the specific building site. This guide explains what to compare, which choices affect cost, and how to select a DIY kit, contractor-supply package, or full-service construction path.
What pole barn kits and pricing really cover
A pole barn kit is a full set of parts for a post-frame building. It gives you what you need to build the main frame, walls, and roof. Many people in Oregon and Washington buy these kits to save money on labor. You get the parts and build the shell yourself or hire a crew. It is vital to know that kits from Locke Buildings include expert plans and engineering papers. This means the building is made for your exact land and climate.
Standard parts in a building kit
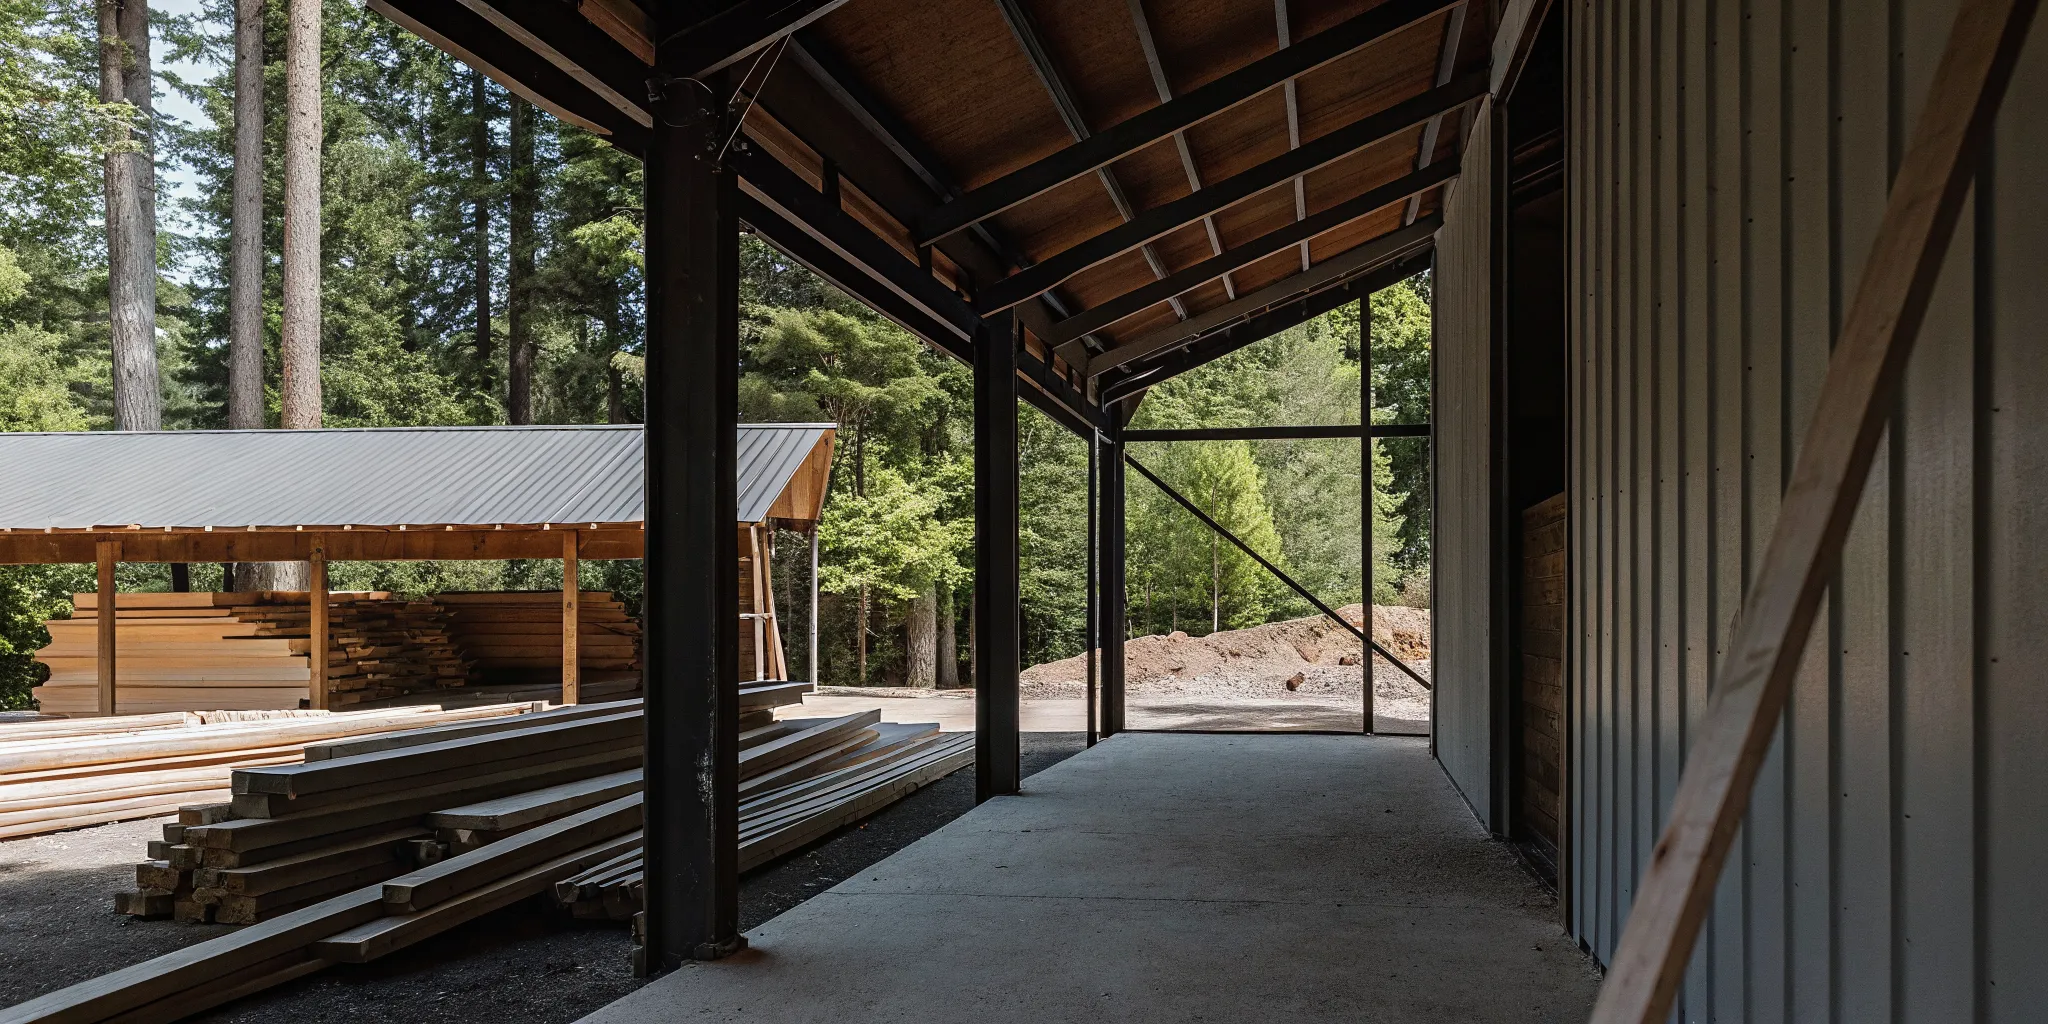
A high-grade kit should have more than just wood and metal sheets. A full set includes the posts, roof trusses, girts, and purlins. It also comes with metal siding, roof panels, and all the hardware like screws and bolts. This makes it much easier to choose the right pole barn kit for your needs. A good kit should have all the parts needed for the main shell.
When you buy a kit, you should also get clear step-by-step guides. These guides help you or your crew put the building together safely. In the local area, your kit must also include data from a pro. This proof shows the building can handle heavy wind and snow. For one, the Oregon Structural Specialty Code sets strict rules for snow loads on buildings. These rules make sure your barn stays safe during big winter storms.
Kit pricing versus total project costs
When you see a price for a kit, it covers the building parts only. You must also plan for the cost of site work, concrete, and labor. These items can add a lot of money to the final bill. Site work includes clearing the trees and leveling the dirt. You also need to think about the cost of getting water and power to the building site. Building near your home can often help you save on these power costs.
Some low pole barn kits and pricing you find online do not include all you need. You might find a kit that looks cheap but lacks the right hardware or plans. In Washington, safety rules say each post must have at least four anchor rods. If a kit skips these parts, you will have to buy them on your own. This can lead to a much higher price than you first planned. Knowing what is in the box helps you keep your budget on track.
Comparing the scope of your quotes
To get the best value, you must look at the full list of parts in each quote. One kit might use better metal or have stronger trusses than another. It is very helpful to review pole building quote scopes line by line. This way, you can see if the price covers the same grade of wood and metal. A lower price might mean the kit uses smaller posts or thinner roof panels.
You should also check if the kit includes shipping and tax. These extra fees can change the total price by a lot. Kits from Locke Buildings are ready for use across Oregon and Washington. Our team makes sure the package has every part needed to meet local building codes. Checking the small details now will help you avoid costly lags during the build. Buying a complete kit saves time and gives you peace of mind.
What is included in a pole building kit?
A pole building kit is a full set of parts to build a post-frame structure. It is not just a pile of wood and metal. A good kit has everything you need to build the outer shell. When you look at pole barn kits and pricing, you must check what each seller offers. Locke Buildings gives you a full package so your project goes well from the start.
Frame parts and outer supplies
The core of any kit is the frame. This includes the posts, which are the main support for the building. It also has the roof trusses and the wood for the walls and roof. These wood parts are girts and purlins. Locke Buildings kits include all frame supplies and the metal parts to join them. A standard kit includes these items:
- Main posts and roof trusses
- Wood girts and roof purlins
- High-grade metal siding and roofing
- Full trim and flashing sets
Most kits also come with the screws you need. These are the bolts and nails for the frame and skin. Having every screw in the box is a big help for a DIY builder. Washington safety rules say that each column must have at least four anchor rods to stay safe. A complete kit makes sure you have these parts on hand. This saves you trips to the store and keeps your site moving. It makes sure that the building is safe and meets the laws in your area.
Plans and local papers
In the Pacific Northwest, you need more than just wood. You need plans that meet local building codes. Oregon and Washington have high snow and wind loads that change by spot. You need stamped plans to get a permit from your town. Locke Buildings includes these plans and design papers in their kits. This is a key part of the value they offer to every buyer. It ensures that the building is strong enough for the local climate.
Recent changes have made this even more vital for home owners. Oregon now uses new rules for design snow loads based on risk. Your building must be strong enough for the exact spot where you build. If your kit does not have local plans, it may fail or you may not get a permit. This could lead to big costs later on. Having the right papers from the start is a big help for any project. It gives you peace of mind that your shop can handle the winter weather.
Parts not in the box
You should know what a kit does not have. Kit prices are for the parts and plans only. They do not include the work to build it. You will also need to pay for site prep. This means clearing the land and making it flat. Concrete for the floor and post holes is also not in the kit. Most people hire a team for this or do it on their own. You will need to buy these from a local store to finish the job.
You must also think about power and water. A kit does not have the parts for lights or pipes. This includes wires and drains. If you build near your house, you can save cash on these lines. Before you buy, you should check what each building quote includes to see the full cost. This helps you plan your cash and avoid shocks. A kit is a great way to save, but you must know the full scope of the work before you start. Knowing what is in the box helps you find the best value.
A typical pole building kit supplies the structural shell, plans, and specified hardware. It generally does not include site preparation, concrete, labor, installation, utilities, or interior finishes, so buyers should confirm every inclusion and exclusion in writing.
What affects pole barn kit pricing?
The cost of a material package for your barn involves many parts. While size is a big driver, the way you build matters too. You should look at the full list of what you get. A good kit has more than just lumber and steel. It has every bolt, plan, and guide you need to finish the job. Knowing these facts helps you set a real budget for your build. It also stops you from having to buy extra parts at the last minute. This saves you time and keeps the work moving fast.
Building size and structural spans
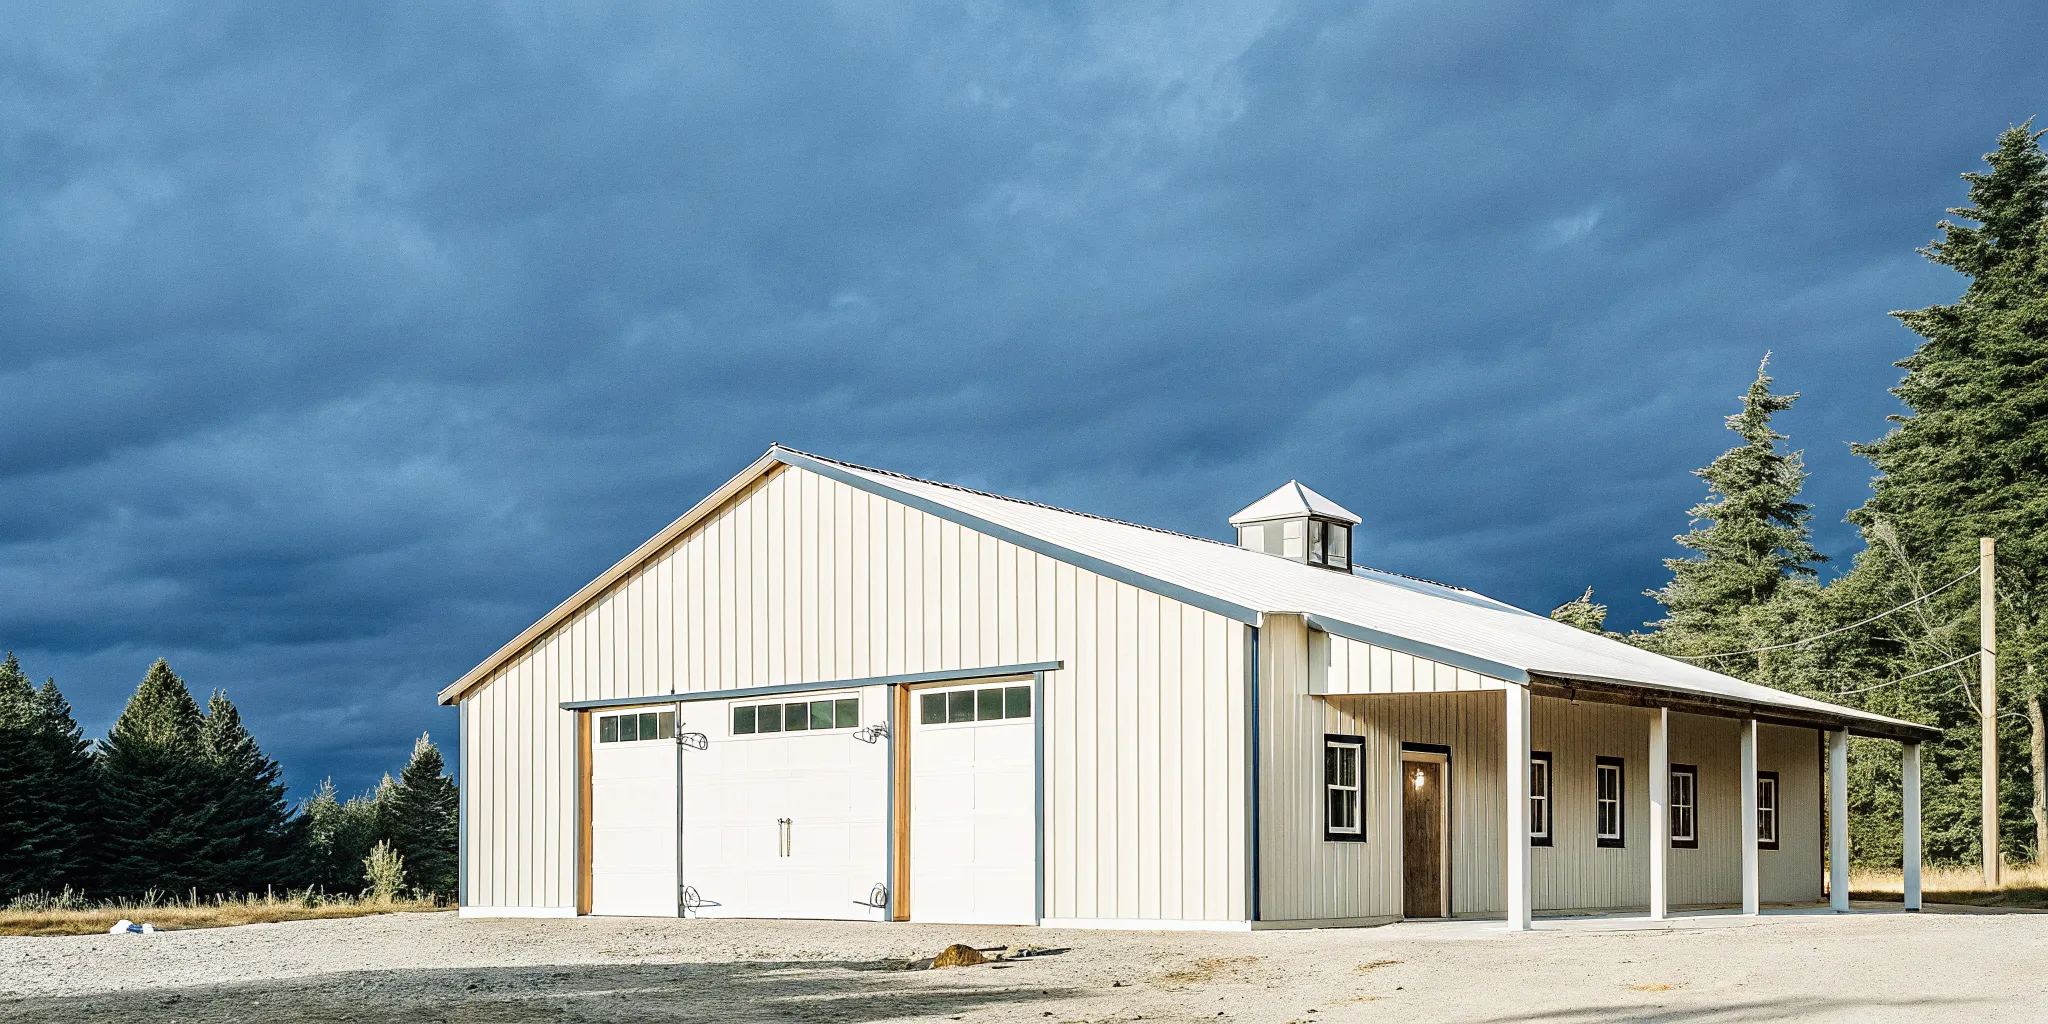
The width and length of your building are the first things to think about. Larger buildings need more wood and metal, which raises the price. But the clear span is also a major factor in pole barn kits and pricing. A clear span means you have no posts inside to block the floor. To do this, you need bigger and stronger roof trusses. These large trusses use more high-grade lumber and cost more to build. For example, a 60-foot span needs much heavier wood than a 24-foot span. This is why wider buildings see a jump in the price for each square foot.
Wall height is another key choice that changes the cost. Taller walls need longer posts and more metal siding. They also catch more wind, so the frame must be stronger to stay safe. If you want a shop for a large RV or a farm tractor, you will need more height. This change adds to the part count and the final price of the kit. Most people find that adding a few feet of height is a smart move. It gives you more space for storage or future lofts without adding much to the footprint. But keep in mind that taller walls might need thicker posts to handle the wind.
Local snow and wind loads
In the Pacific Northwest, weather plays a huge role in the plan for your barn. You cannot use the same kit in the valley that you use in the high mountains. High spots get much more snow each year. This extra weight puts a lot of stress on the roof and the walls. New rules from the Oregon Building Codes Division now use new maps to set these loads. These maps help find the right snow load for your exact spot. This ensures your barn is safe and meets all local building laws.
Wind loads are also vital in coastal areas or open plains. Strong winds can lift a roof or push a wall over if the frame is too weak. Plan teams adjust the kit parts to handle these forces. This may mean adding more braces or thicker steel panels. In places like Washington, safety rules require at least four anchor rods for each post. These bolts keep the frame tied to the ground during a storm. While these parts add to the cost, they keep your barn standing for many years. You should always use Locke’s quote comparison guide to see if these parts are in the price.
| Detail | Standard Utility Kit | Custom Plan Kit |
|---|---|---|
| Best Use | Basic storage or shed | Workshops or commercial use |
| Roof Trusses | Standard spacing | Heavy-duty snow load design |
| Main Posts | 6×6 treated lumber | Built-up or large-scale posts |
| Wall Height | Usually 10 to 12 feet | 14 feet or taller |
| Anchor Plan | Basic concrete pads | Four-bolt steel anchor rods |
Design and finishing choices
The number of doors and windows you add will change the price of the kit. Each opening needs a header and extra framing to hold the weight. Large bay doors for trucks cost more than small doors for people. You can also pick from many types of metal siding and roof colors. Some finishes stay bright longer or resist rust better in our wet climate. You might also want to add insulation or a vapor barrier to keep the inside dry. These choices allow you to match your new barn to your home or other shops on your land.
Think about site access and delivery too. If your land is hard to reach, it may cost more to get the parts there. You should plan for a flat spot where the truck can unload the wood and steel. This helps keep the kit in good shape and makes the build go faster. When you look at pole barn kits, make sure you know what is in the box. A full kit saves you from many trips to the lumber yard later on. It also ensures that every screw and bolt fits the way the plans say they should.
Size establishes the baseline kit cost, but structural spans, wall height, openings, engineering loads, finishes, delivery access, and material specifications determine the final package price. Compare quotes by scope and specification, not by headline price alone.
How Oregon and Washington change the project
Building a new shop or barn in the Pacific Northwest brings big jobs. The land and the weather in Oregon and Washington are unique. These local facts change how you plan your build and how you budget. You must think about state rules, county laws, and the real site before you buy. Knowing these details helps you choose the right pole barn kit for your land.
Codes and permits
Each county in Oregon and Washington has its own set of rules for building. Some areas have strict laws that limit where you can put a barn. You will need a permit before you start any work on your site. The process often starts with a trip to the local office to learn what they need. In Washington, safety rules are very strict for post-frame work. For example, the state says each main post must have at least four anchor rods or bolts to keep it steady. These small details ensure your building stays safe and strong for a long time.
Getting your plans right from the start saves you time and money. If you try to build without a permit, the county might stop your work or fine you. This is why top kits include the plans you need to show the local office. Most counties want to see that an expert checked the plans for safety. When you look at pole barn kits and pricing, check if the plans are part of the deal. Some kits only give you the wood and metal, but others give you the full paper trail for the permit office.
Snow, wind, and seismic needs
The Pacific Northwest has very varied weather. A barn in the Cascades needs to hold much more snow than a shop in the valley. Oregon uses the Structural Specialty Code to set these rules. In 2025, Oregon changed how they map snow loads to make them more exact for each spot. Your building must handle three main forces in this region:
- Heavy snow loads that can weigh down a roof in the winter.
- High winds from the coast or through the Gorge.
- Shaking from likely quakes across the region.
These needs have a big effect on pole barn kits and pricing. A kit for a mild climate might fail in a high-snow zone. Stronger wood and more metal add to the cost of the supply package. For a medium 24×24 kit, prices in Washington may start near $22,000. But if you need a huge barn, the cost can go up to $250,000 or more. Always make sure your quote includes the right loads for your set zip code so your permit gets a green light.
Design work is not a place to cut costs. A building that is not strong enough for the local snow can sag or fall. Most local offices will not give you a permit unless a pro signs off on the design. This stamped plan shows that the building is tough enough for your land. It proves the trusses can hold the weight and the posts can stand the wind. Having these papers ready makes the whole process smoother and keeps your build on track.
Climate and site drop off
Rain is the most common factor for builds in Oregon and Washington. The wet ground can make site prep hard and slow. You must ensure your site has good drainage so water does not pool near your posts. It is best to plan your dirt work for the drier months if you can. If you build in the winter, you might need to spend more on rock and gravel to keep the site from turning into mud. This helps big trucks get in and out when they drop off your supplies.
The drop off is another key part of the plan. Locke Buildings sends kits all across Oregon and Washington. But their full-service crew stays in a tighter zone between Centralia and Salem. If you are outside this area, you will likely be the one to manage the build. You need a clear path for a large truck to reach your site. Low trees or soft soil can block a shipment. Checking these paths before the truck arrives prevents delays and extra fees.
Think about where you put the building on your land too. Putting it near your main power or water lines can save you a lot of money. If you build far away in the back of a lot, you will pay more for pipes and wires. A good site plan looks at the whole picture. It tracks where the sun hits, where the wind blows, and how the trucks will get there. Taking the time to map this out ensures your new barn fits your needs and your budget.
Should you choose DIY, contractor supply, or turnkey?
Picking the right way to build depends on your skills, tools, and free time. You can save money by doing the work yourself or let experts handle the whole project. Each path has different costs and needs. It is key to compare specifications and exclusions to see which choice fits your budget and your plan for the new space.
Building it yourself with DIY kits
A DIY kit is a great choice if you have the tools and time to lead the build. These kits give you all the parts you need to finish the main shell of the barn. Locke pole barn kits include the plans, wood, metal, and bolts. In Oregon and Washington, these kits must meet strict rules for wind and snow. This is because regional weather changes fast based on local terrain and height, as noted by the Oregon Building Codes Division.
You can get kits delivered anywhere in Oregon or Washington. But keep in mind that kit prices only cover the materials. You will still need to pay for site prep, concrete, and any labor you do not do yourself. Most pole barn kits can help you save on total costs if you have the right help to set them up. Building a kit near your existing home can also help you save on power and water lines.
Working with a contractor supply plan
If you have a local builder you trust, a contractor supply plan works well. We give the materials and plans to your pro. This path is good for people who live outside our main building zone but want our high-quality parts. You get our expert design and strong materials while your own crew handles the daily work on the site.
This middle path gives you more control than a full build but less work than a DIY project. It lets you use our regional skills while keeping your own team. Your builder will need to follow local safety rules. For example, laws in Washington state say that all structural columns must have at least four anchor rods to stay safe.
Choosing a full turnkey project
A turnkey project is the easiest path for most owners. We take care of everything from the first design to the final trim. Our team runs the crew and makes sure the build meets all local codes. This full service is available from Centralia, Washington down to Salem, Oregon. It is best for complex jobs like large shops or custom homes where you want one point of contact.
While this path costs more than a kit, it saves you the stress of running a building site. You get a firm plan and a team that knows the local soil and weather. We use our own crews to ensure the highest quality. This path is the fastest way to get your building ready to use without having to lift a finger yourself. It is the best choice for those who want a professional result without the hard work.
The best build path depends on who will manage labor and site coordination. DIY kits offer the most hands-on control, contractor supply pairs Locke Buildings materials and plans with a local crew, and turnkey construction places more project responsibility with Locke Buildings within its full-service area from Centralia, Washington to Salem, Oregon.
How to plan and price your pole building kit
Planning for pole barn kits and pricing starts with a clear goal for your land. You must find the right spot on your property and decide how you will use the space. A solid plan helps you get an exact quote and avoids costly changes later. Follow these steps to move from an idea to a ready-to-build material package.
Choose your building size and site
First, pick a size that fits your needs for work or storage. Think about what tools, cars, or animals will go inside. You also need to check your building site for level ground and easy access. Building near water and power lines can help you reduce the cost of setting up services like light and heat.
Check local rules and loads
Every county has different rules for how you build. You must know your local snow and wind loads before you buy a kit. In Oregon, local codes must account for diverse climate zones and steep hills to keep the structure safe. Your kit should come with stamped plans that meet these specific regional needs.
- Pick your size and use. Decide the length, width, and height based on what you need to store. Think about future needs so you do not outgrow the space too fast.
- Use the 3D Building Designer. Go to the Interactive 3D Pole Barn Designer to see your ideas in real time. You can add doors, windows, and pick colors for your siding and roof.
- Confirm your site details. Make sure your site is flat and has room for delivery trucks to get in. Check for any underground lines or overhead wires that might be in the way.
- Decide your build scope. Determine if you will build the kit yourself or hire a pro. This choice affects your total budget but does not change the cost of the material package.
- Review the material list. A high-quality kit includes all structural wood, metal, and hardware. Check that it also comes with the engineering papers you need for a permit.
- Submit your design for a quote. Once your design is ready, send it in to get a firm price. This step turns your 3D plan into a real list of costs for your project.
Compare your building quotes
When you look at prices, make sure you compare the same items. Some low prices may leave out key parts like trim or heavy-duty trusses. A full pole building kit should have every piece of hardware and wood needed to finish the shell. Always ask if the price includes the stamped plans you need for your local permit.
How to compare pole barn kit quotes
Getting quotes for your new building is a big step. But not all quotes are the same. Some shops show a low price that skips vital parts. Others give you a full package that is ready for a permit. To make a good choice, you must check each detail. This helps you find the best value for your pole barn kits and pricing needs.
Look for stamped engineering
The first thing to check is if the kit has plans done by an engineer. In Oregon and Washington, local codes are very strict. Oregon uses a special list to find ground snow loads for every spot. You can see how these rules work on the Oregon state website. A good kit should come with plans that have a seal from a pro. This seal proves the barn can handle the wind and snow in your town.
Without these plans, you might fail your permit check. Some cheap kits only give you a basic sketch. They do not account for the weight of wet snow or strong gusts of wind. If you have to buy your own engineering later, it will cost much more. A full quote lists stamped plans as a part of the price. This saves you time when you talk to the building office.
Review the main materials
Next, look at the list of main parts. A true pole barn kit should have every piece needed to finish the shell. This includes the posts, roof trusses, and wall boards. You also need the metal siding and roofing. It is smart to compare pole building quotes to see which one is the most full. Look for better items like high-end metal that resists rust. Better metal keeps the barn looking new.
Also, check the post depth and size. A quote that includes these details shows that the shop knows how to build a strong frame. It gives you peace of mind that your barn is built right. You want parts that are made to last in our rainy Pacific Northwest climate. Comparing these specs helps you avoid low-quality materials that fail early.
Check for hardware and safety
Small things matter just as much as the big ones. Some sellers skip things like bolts and screws to keep the price low. A complete kit should have all the hardware needed to put the barn together. In Washington, safety rules say each column must have at least four anchor rods. You can check these safety rules online to see why it matters. If the kit does not have these rods, you will have to buy them yourself.
A good quote will list these safety items clearly. It should also show things like closures for the roof and door seals. These parts keep the weather and bugs out of your new barn. Having everything in one package makes the job much easier for you or your team. Buying a complete kit saves you from extra trips to the store.
Verify shipping and support
Think about how the kit will get to your land. Shipping is a big part of the total cost. Some companies charge a high fee to ship long ways. Others might have a better way to move goods. You should ask if they ship to your spot in the Northwest. Knowing where the kit comes from helps you plan for when it gets there. Always ask about the unloading process to avoid surprises on delivery day.
Last, ask about the help you get after you buy. You want a team that is easy to reach if you have a question. Check if the kit has a clear guide with steps to follow. Good guides show you how each part fits together. This makes the work go faster for you or your crew. A shop with local knowledge can also help with permit questions. They know what local checkers look for and can guide you through the process.
Frequently Asked Questions
How much do pole barn kits cost in Oregon and Washington?
Prices for complete kits in this region usually range from $22,000 for a small 24×24 shop to over $250,000 for large commercial sites. According to Columbia Structure, these costs depend on local snow and wind loads. You must also account for local taxes and shipping fees. Keep in mind that kit prices only cover the building materials and do not include the work to set them up.
What is included in a typical pole barn kit?
A professional kit includes more than just wood and metal. Most packages come with stamped building plans, structural framing, trusses, and full roof sheathing. They also include the siding and all the hardware you need to finish the job. According to Locke Buildings, quality kits also provide full engineering papers and manuals. These documents help you get the permits you need from your local city or county building department.
Does the price of a pole barn kit include installation?
No, the price you see for a kit covers the materials only. It does not include the cost of labor to build the structure. You will also need to pay for site prep and concrete separately. While Locke Buildings offers full building services from Salem to Centralia, their kits are for DIY builders or contractors. You should get separate quotes for any earth work, foundation pours, or electrical needs you have.
Are site preparation and concrete included in kit pricing?
No, site work and concrete are not part of a standard kit package. You must prepare a level pad and pour the foundation before the building arrives. These steps are vital for a safe build and long life. According to Washington State law, safety rules require specific anchor rods for each column. You will need to hire local pros to handle these tasks or do them yourself before the kit delivery.
Can I customize the design of my pole barn kit?
Yes, you can customize almost every part of your building kit. You can change the size, door style, and color to fit your needs. Many buyers use a 3D design tool to see their barn before they buy. This allows you to add features like porches or lean-tos. Once you finish your design, a team will check it to make sure it meets the snow load rules for your specific area.
Are you ready to design your pole building and request a quote?
When you are ready to move from research to a real plan, Locke Buildings can help you choose the right project path and prepare a project-specific quote. Start with a design that reflects your site, intended use, dimensions, doors, and other priorities.
Ready to design your building and request a quote? Use our 3d building designer to request a quote for your custom building today so you can start your project in Oregon or Washington and get the space you need for your tools and gear.